I have SAQA deadline tomorrow so I am finishing this up to send. Acrylic paint, fabric paint, inks, markers, thread, now I am beading and embroidering a bit. It's a perfect rainy day project.
Sunday, January 30, 2011

Friday, January 28, 2011
UCR Botanical Gardens
Today our plein aire painting group was invited to paint the botanical gardens. They have been closed since Christmas due to flooding and they are going to reopen next weekend. There is 46 acres of gardens from succulents to tropicals, roses to herbs. Everything is starting to bloom. This hillside was in the South African garden. This is one of my sketches.

Thursday, January 27, 2011
Postcards from our walks- Sharing Art Globally

Tuesday, January 25, 2011
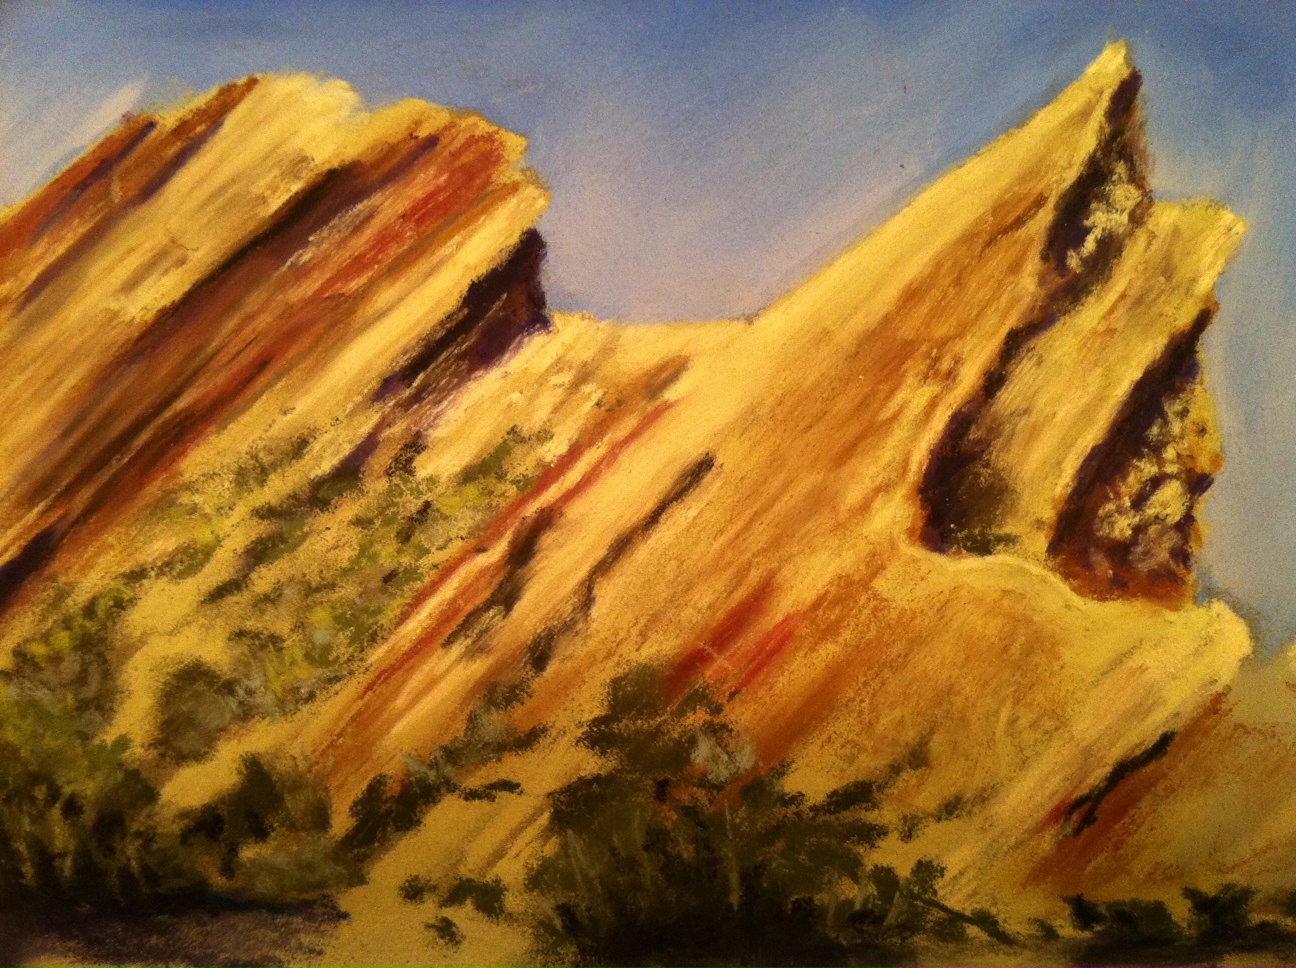
Vasquez Rocks- photo meetup group

We went with the photo meetup group to Vasquez Rocks. These rocks seem to jet out of the earth at these sharp angles and can reach up to 150 feet tall. Made of sandstone the rocks are barren and void of most vegetation, it was like being on a different planet, a moonscape. The area has been featured in many movies, advertisements and music videos. I ended up painting two watercolors and did one small 5x7 pastel. These were all done with no prior drawing and sitting with Jennifer on a picnic table while Randy hiked up the mountains to get some vista view photos. I was glad that the weather is still cold enough that I think most of the snakes are hybernating since we ended up walking around the mountains to find another plein aire paint group that was there. The weather was perfect and afterwards we all went to lunch and then to another site were oil was discovered in Calif back in the 1800's

Tuesday, January 18, 2011
The suns out, and we are out for our walk

Monday, January 17, 2011
Lino Block carving Workshop-A fun day in the sun
Saturday I had a linoleum block carving workshop. It was such an amazing day, the weather was perfect and we ended up working outside where we also had our lunch. Here are some of the photos and beautiful prints that we achieved. I want to share the process so you can also try this yourself. Some of the women felt it was almost Zen as it was so relaxing, a perfect destresser!
I took some of my photos of a fountain, of some of my paintings and I even used a sketch. I scanned them into photoshop where I used the stamp filter to change to a simple cut out design. You can decide how smooth or how cut your stamp will be, by sliding the adjustment bar right or left. For a more complex look you can also make multiple stamps for different layers of color by using the cutout filter. In some cases changing the photo to grayscale helps but often just letting the computer assign colors works for easier transfer to linoblocks. This will require you to seperate out each color and cut a lino block for each color. It also requires you to have a stabilizer and alignment method so each block will line up correctly for the layers of stamping you will do. If you decide to use the easier approach which is the stamp filter you will be able to print up a black and white copy on your inkjet printer which can then be burnished onto the lino block. Also remember if you want to use text make sure you mirror it first and then carve so that your stamp will produce the text correctly. If you use speedball printing inks for printing your stamps they will bleed if you decide to paint over your block prints.

We tested the standard Linoleum blocks which are already mounted on wood verses the softer carving material that is also available. Most prefered the linoblocks as they seemed to cut cleaner, producing a much cleaner edge.

I used a photo of Randy that I love from our trip to Italy.
 |
| Desiree |
Here are some of the results. These block prints can be printed and painted, printed on fabric. We are thinking of using them for stamping our artquilts using fabric paints. So many ways to use them and they last for a very long time. Once you have created one of these unique stamps you can print multiple copies for cards, for selling etc. Make sure when you get a good print that you sign below and number. A limited number of prints keeps the artwork valued. You can also display your blocks on a shelf as a piece of art, Enjoy!
 |
| Kay |
 |
| Marilyn |
 |
| Marta |
 |
| Nancy |
Wednesday, January 12, 2011
Berry trees

Sunday, January 02, 2011
WDE Jan 2nd
WDE Jan 2nd
Originally uploaded by ddhabicht

Subscribe to:
Posts (Atom)


.jpg)