Hi everybody!! Its Desiree here and its that time of the year, the kids go back to school! I am so excited to be partnering with Sulky® for a
Back to School Sewing Series. Sulky has gathered several designers to create some fun projects for you and your kiddos as they go back to school and you get some long over due sewing time!
Guest Bloggers:
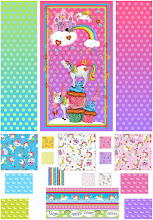
I thought it might be fun to create a special lunch bag. There are several patterns available out there. This is one I put together combining things I love from several different bags for all of you. I am using my embroidery designs© that I created for hooded towels to add some whimsy and they work great! I am also giving you a sneak peek of my newest fabric line in stores this December called "Party like a Unicorn©" by QT Fabrics. I hope you enjoy this project and all the projects brought to you during this fun few weeks on Sulky's Blog. Lets get started!
-->
Desiree’s
Whimsical Insulated Lunch Bag
Take a sneak peek of some of my fabric in my newest
fabric line in stores this December!! It's all about pink and purple, Unicorns and cupcakes, castles and superhero capes!
Fabric
Requirements:
1. 1/3 yd main fabric or outside fabric (Fabric
A)
2. 1/3 yd lining fabric (Fabric B) (You can use an oil cloth or vinyl fabric if desired)
3. 1/3 yd Insul-bright®
4. 1/3 yd Fuse 'n Stitch® (Optional – used to make your
bag stiffer)
4. Strip of Velcro
5. KK 2000™ Temporary Spray Adhesive for holding Insul-bright in place
for sewing
6. Cotton + Steel Thread by Sulky for assembly, Sulky's Poly Deco™ thread for embroidery because its washable!
Cutting
Instructions:
Cut from Fabric A
(main fabric, I used different fabrics for these blocks for fun) and
Fabric B (lining fabric):
8”x19” back and front flap block
8”x10” (front)
4”x10” (cut 2)(sides)
4”x8” (bottom)
Cut one from Fabric A (main fabric or coordination fabric)
4”x 11” (strap)
Cut from Insul-bright and Fuse 'n Stitch (Fuse 'n Stitch is optional, use if you would like a stiffer bag)
7 ½” x 18
½” (backing and flap)
7 ½” x 9 ½”
(front)
3 ½”x 9 ½”
(cut 2) (sides)
3 ½” x 7 ½”
(bottom)
Preparing your lining fabrics (Fabric B):
Fold your first piece of Fabric B in half lengthwise and finger press a centerline. Open the fabric and now fold each raw edge into
the center fold line and finger press those two folds. You will now have 3
finger pressed lines on your fabric. Spray your piece of Insul-bright with KK 2000 and stick the Insul-bright in the center on the wrong side of the fabric;
making sure it is not in the seam allowance. Take to the sewing machine
and stitch down, on the fabric side, following each line on the fabric side,
one in the center and one on each side. You should have three stitch lines that are holding down the Insul-bright. This will help to hold it in place as you sew your bag
together. Repeat for all of the Fabric B pieces.
-->
To prepare the
main fabric flap (Fabric A) if adding embroidery:
If you want to add any
embroidery to your lunch bag now is the time. I decided to add
my Unicornhoodie design (5”x7” hoop) to the front of the flap and another embroidery
design to the backside of the main flap piece (8”x19”). You may have to rotate
the design or the fabric to position correctly. I used the Fuse and Stitch as my stabilizer and hooped it up. Place both the front image and rear image as close to the edge of your fabric as you can. Make sure your images are in the right position and nothing ends up upside
down. This is a great way to personalize
your child’s bag, add his name etc. Trim excess Fuse 'n Stitch. Once your embroidery (optional) is finished
you are ready to proceed. Get my
CD of all the hoodie designs to make hoodies and lunch bags!
 |
| My little Embroidered Unicorn |
To prepare the
main fabric without added embroidery:
Take the cut pieces of Fuse 'n Stitch and press them to
the wrong side of the fabric. Center them so that it is not in the seam
allowances. Using a steam iron, steam press the Fuse 'n Stitch into place. This
is an optional step. The Fuse an'n Stitch will create a stiffer bag, not using
it will create a softer, floppier bag.
Preparing the
Lining fabric Flap if adding a pocket:
I wanted to add a pocket inside of the bag for anything
extra like money or a note etc. I fussy
cut a saying from my new fabric line and created a pocket. Cut a piece of
fabric 6”x 8 ½”. With RST fold it in half so you have a 6”x 4 ¼” block. Sew
around the edges leaving an opening to turn. Turn RSO and press. Turn under the
opening and stitch. I then top stitched around the whole block. Position your
pocket in the center of the prepared lining flap piece approx.8” from
the bottom edge off the lining flap(this edge is the one that is inside of the lunch box at the bottom). Stitch from right to left, but leave the
top of the pocket open. Your pocket is finished.
Making the Strap:
Starting with the strap. Fold in half lengthwise so that the
right sides are together (RST), stitch along long edge. Turn so right sides are out. Press. Fold again
lengthwise and stitch the long edge, you will have 4 layers of fabric that
create the handle strap. Set aside
Assembling the
inner and outer bags:
Take the 8" x 10" main front fabric piece (Fabric A) and lay it right side up on a flat surface. Now place a 4"x10" side piece RST on each side of the main front fabric. Sew the two side pieces to the main front fabric along the outer raw edges. Next, place your (8"x19") backing/flap piece RST onto the main front fabric and side piece and line up the left side raw edges and sew together. Now line up the raw edges of the backing/flap piece with the side fabric and sew together. You should now have a box with a flap.
You will now repeat these steps with the prepared lining
fabric, Fabric B. Once you have all your sides and front/back sewn together you
need to add the bottom pieces (8”x 4”).
-->
To do this carefully pin the bottom piece to the assembled
bag pieces matching the corner seams. Carefully sew into place, removing pins
as you sew. You should now have two boxes with bottoms.
Velcro attachment
Cut a piece of velcro about 4”long and place the piece onto the front part of the main fabric centered about 3 ½” up from the bottom to the top of the
Velcro. I put the soft side here and the teeth side onto the lining part of the
flap about an 1 ½” from the edge of the flap end. Sew into place. Try to make
sure they will line up since this is how the bag will close.
Putting it
together:
Take the main fabric section and turn it so that the right
sides are facing out. Push the main fabric down into the lining, matching the
corner seams and pinning into place. I like to use a chopstick to push my
corners into place. You may have to play with the bags a bit to get them to
line up but they will. Pin together along all raw edges. Make sure you mark a
5” area on the flap to leave open. ( If you want to have rounded corners on
your flap use a glass or other round object to mark the corners and trim to
round off.
Handle
Before pinning all the edges, take your strap and place it
in between the two pieces of flap, Fabric A (8”x19”) right above the box on the
flap of the bag. It should be sandwiched between the Fabric A Main Flap and
Fabric B Lining Flap pieces. Pin it into place along the raw edges on each
side.
Sewing
Starting on the left side of the flap sew down the side of
the flap, then turn and sew across the top edge of the side of the lunch box then sew across
the front and then sew up the other top side and up the flap. Take your time making
the turns so they are clean. Make sure you leave an opening at the end of the
flap to turn the bag. Clip your corners making sure you don’t clip the thread.
Clipping your corners will help your bag lay flat when you turn it.
Turning
Now, put your hand into the opening and pull the inside out
and turn it completely right sides out. Once you have it all pulled through,
push the lining side back into the main fabric side and get the lining tucked
inside as it should be. I use my chop stick again here to push my corners
together into place and smooth out my curves on my flap. I did a lot of pressing here to get
everything in place and flat.
Turn in the raw edges of the opening you used to turn your
bag. Stitch it closed.
Pressing into
shape
You will need to press all the sides well so that the seams
lay flat. You also want to form pleats at the sides, so fold them in and then
iron so it holds its shape. You are now done!!
 |
| Side view |
 |
| back view |
 |
| front view |
 |
| sneak peek of new fabric out in December! |
 |
| pocket view |
Option
I prefer a crisp, finished edge on my lunch bag so I pinned
together each side and did a top stitch so that every edge had a stitched seam.
This takes a bit of effort as the seams are thick but I like the results. It
gave it more stability and allowed it to stand up easier but it is up to you.
 |
| I added this text on the back |